Sponsored by
Bloom Flower Farm
Bloom is a small flower farm in Northeast Iowa run by Jen Opheim and family. At Bloom, we love to watch things grow and to be creative. It all begins with a vision. Maybe you want fresh locally grown flowers for your DIY wedding bouquets. Maybe you want to promote your business with a petite posy giveaway. Or maybe you have a flower friend who would love a unique gift of blooms through our seasonal CSA. Whatever your flower needs are, we’re happy to help. Let’s create something beautiful together!
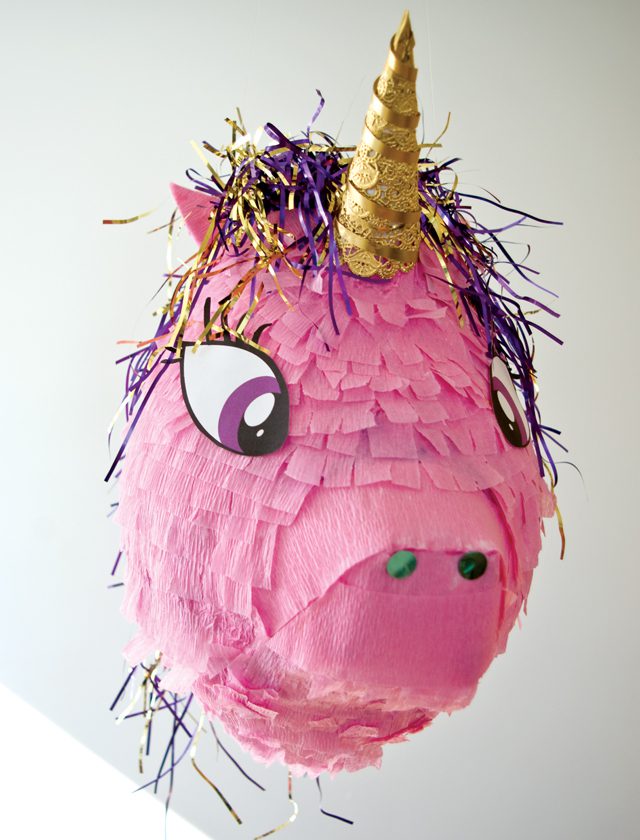
How to Make a Unicorn Piñata
Sponsored by
Bloom Flower Farm
Bloom is a small flower farm in Northeast Iowa run by Jen Opheim and family. At Bloom, we love to watch things grow and to be creative. It all begins with a vision. Maybe you want fresh locally grown flowers for your DIY wedding bouquets. Maybe you want to promote your business with a petite posy giveaway. Or maybe you have a flower friend who would love a unique gift of blooms through our seasonal CSA. Whatever your flower needs are, we’re happy to help. Let’s create something beautiful together!
I mean, who wouldn’t want a super-detailed, bonkers unicorn piñata DIYin their lives?!?
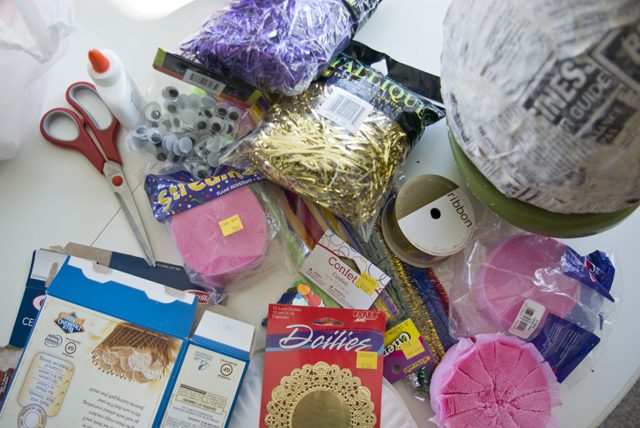
Supplies:
Balloon, newspaper, flour, water, tinsel, paper streamers, ribbon, confetti, scissors, school glue, hot glue gun, pipe cleaners, magic…
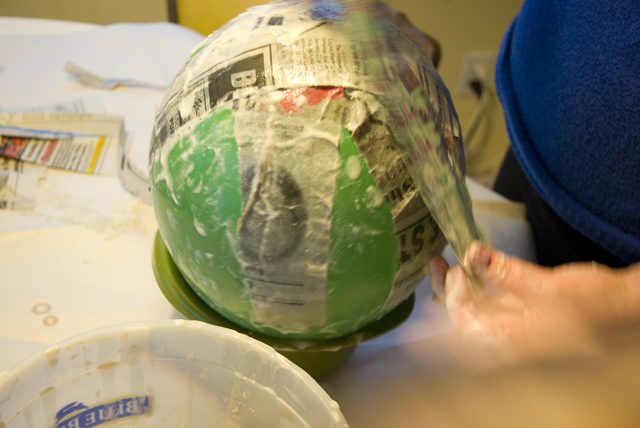
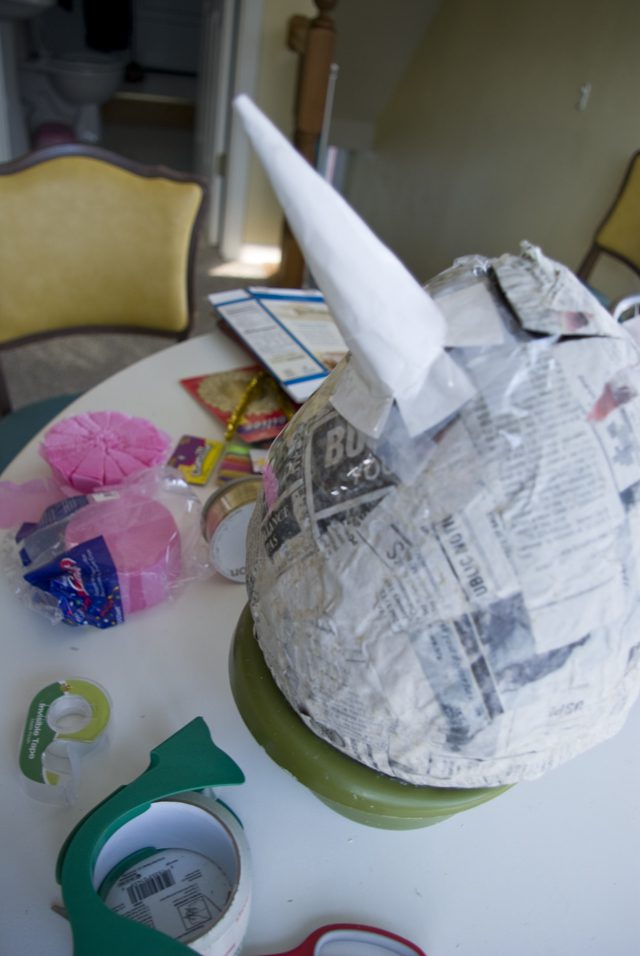
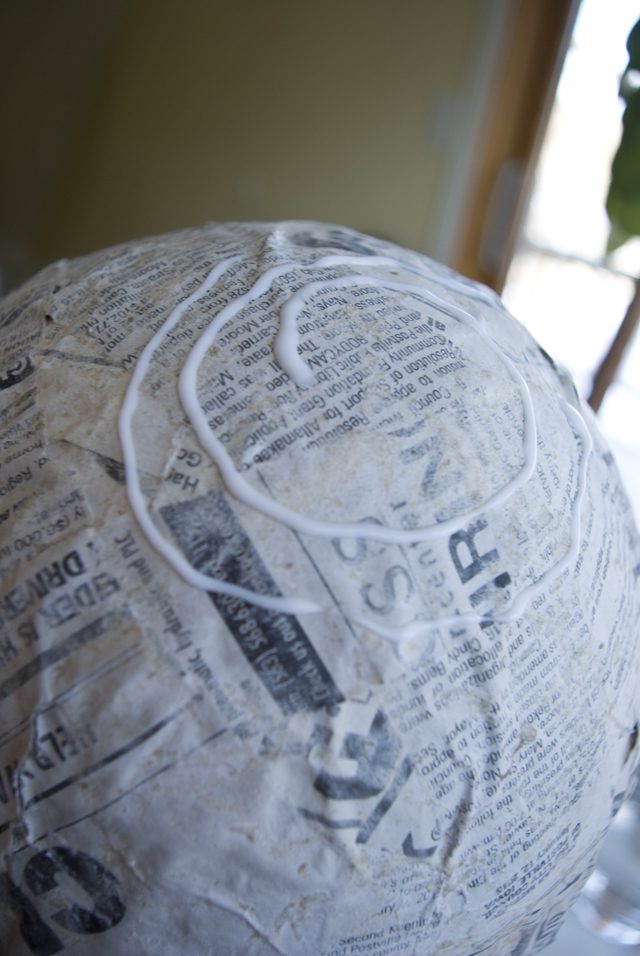
Step One: The Paper Maché
Have you ever made paper maché? It’s awesome. Paper and flour and water become your own personal blimps (minus the flying in the sky part, unless you’re super clever at aerodynamics).
Here’s what you do to get to the starting point for your unicorn piñata:
Blow up a medium-sized balloon.
Find a bowl that your balloon will sit in nicely – you’ll need this for both applying the paper maché and drying the project.
Rip long strips of newspaper. Now rip a few more, because you want your balloon to be nice and layered up so your piñata doesn’t have soft spots.
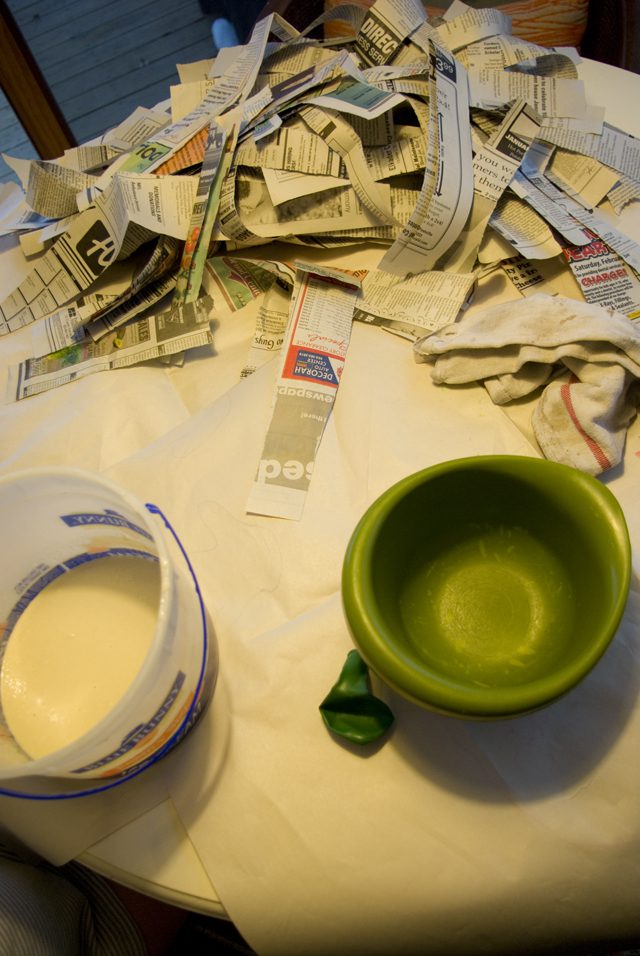
Find a bucket or even a large baking dish, in which to make your flour/water mixture.
Mix 1/2 cup of flour with 1.5 cups water. Pour the flour and water in a large bowl and stir it well. Keep mixing until there are very few lumps left. You want it to have a consistency like school glue. Add more water or flour as necessary.
Dip a strip of newspaper in the glue. Cover it in the mixture, but don’t leave it in very long…you don’t want the paper to fall apart. Run your fingers down the strip to remove excess, and then pat it down over the balloon.
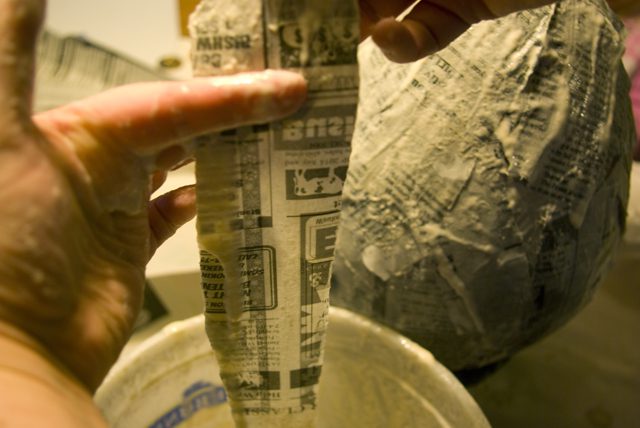
Repeat, crisscrossing the strips, flipping the balloon and doing the same on the other side, and then flipping it over and doing another layer. I found about four layers to be good. I didn’t wait for them to dry in between…just went for it.
Set the project up to dry. Whenever you pass by it, flip it over so the part inside the bowl gets a chance to dry. It should talk about 24-36 hours to be fully dry.
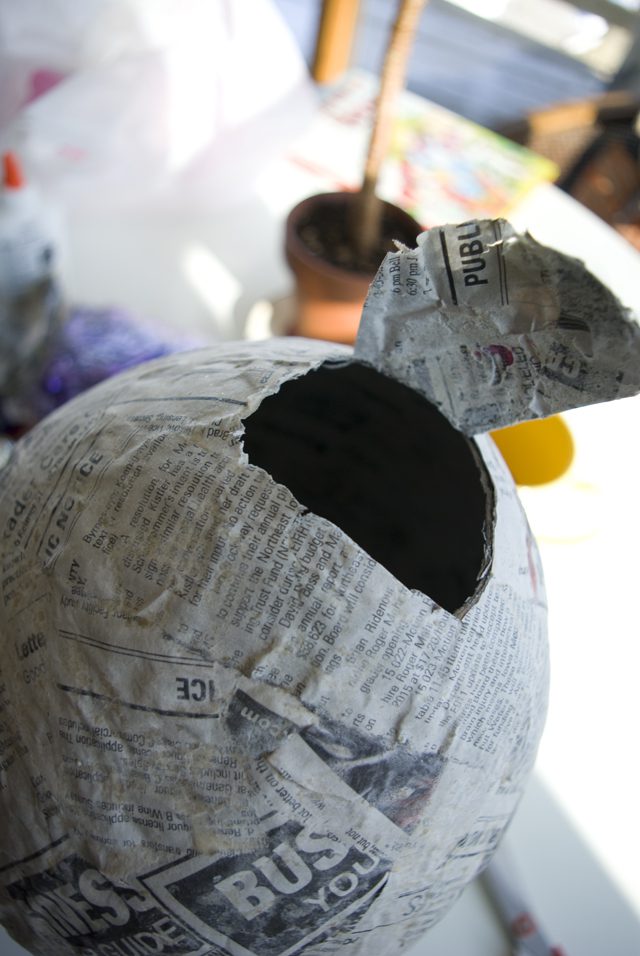
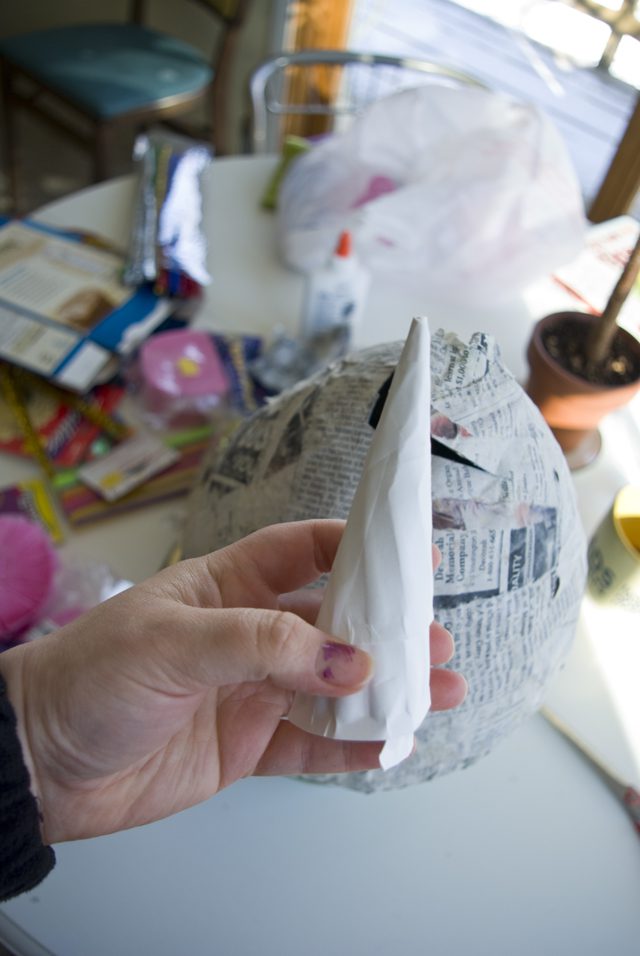
Holding the “bellybutton,” cut a hole in the balloon. Give a little tug and pull the whole thing out. You should have a nice, hard shell left – this is the base of your unicorn piñata!
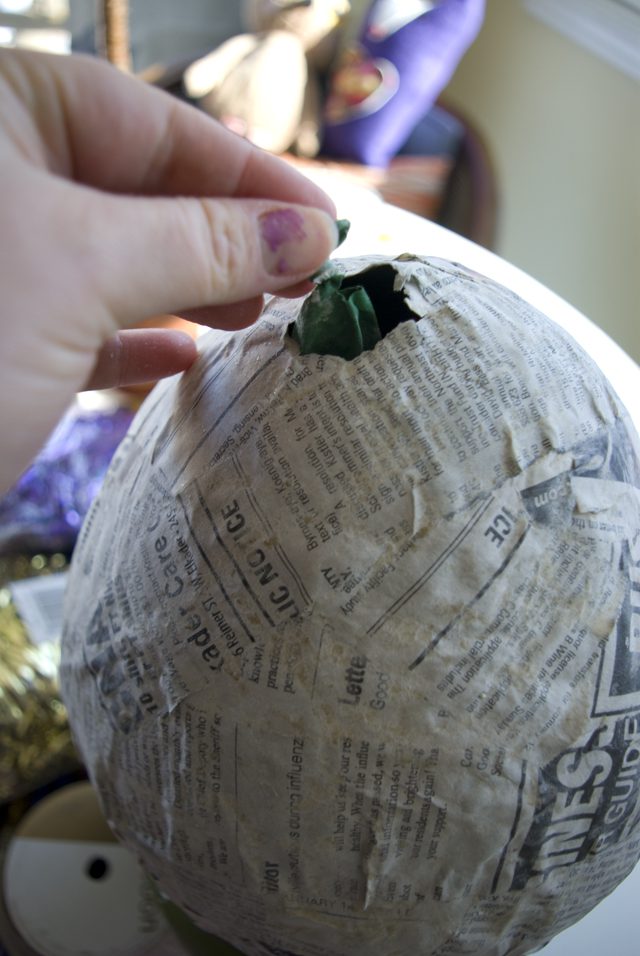
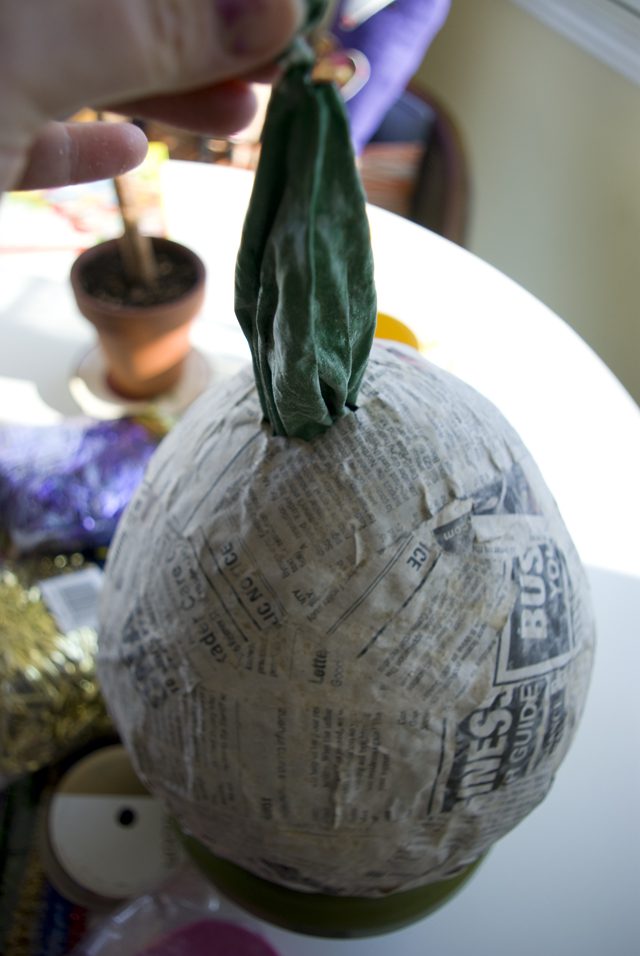
Cut a hole at the top of the shell so you have a way to insert candy or fun surprises once your unicorn is all gussied up.
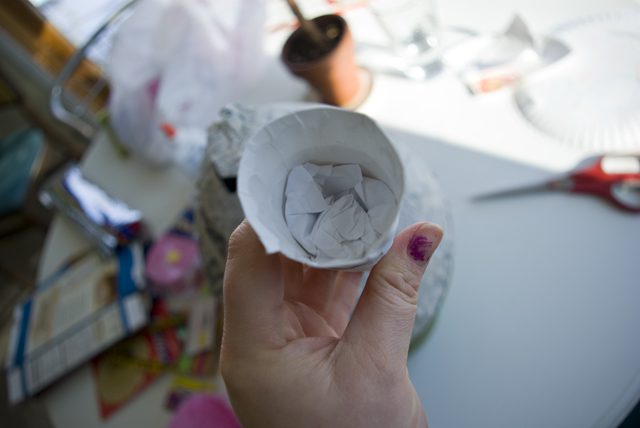
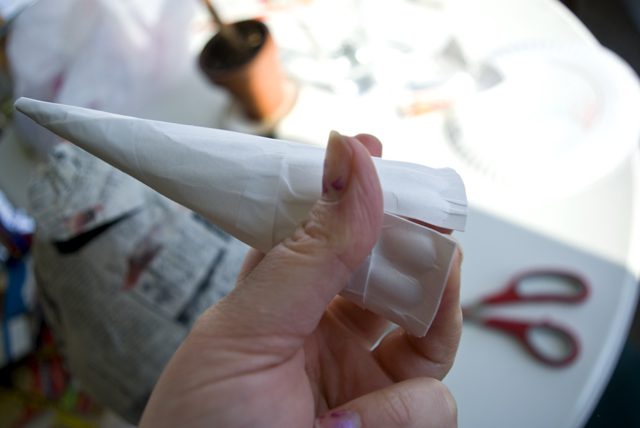
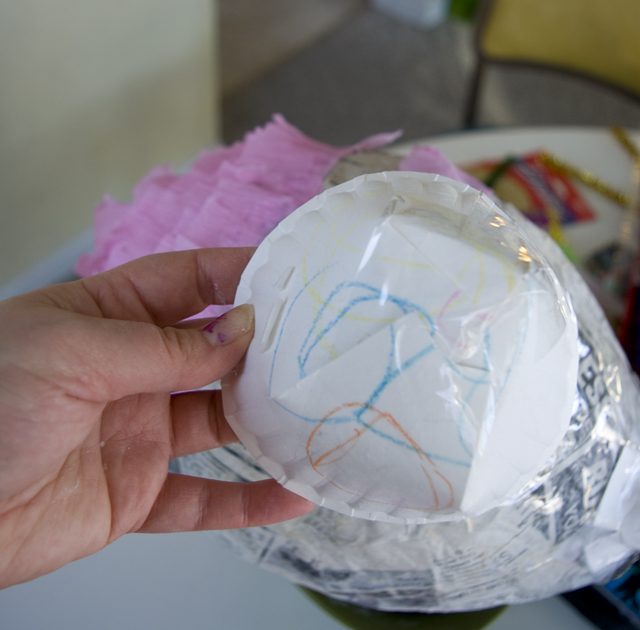
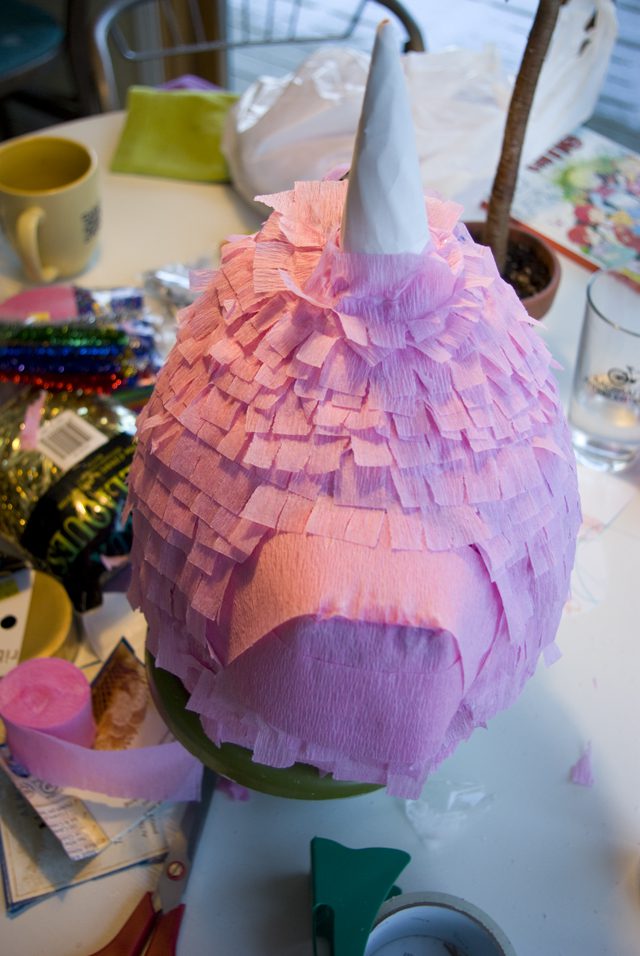
Step Two: The Horn
Cut a basic paper plate in half, and roll it into a tube. I found if I held the tip at the point, it did best. Tape it together so it holds.
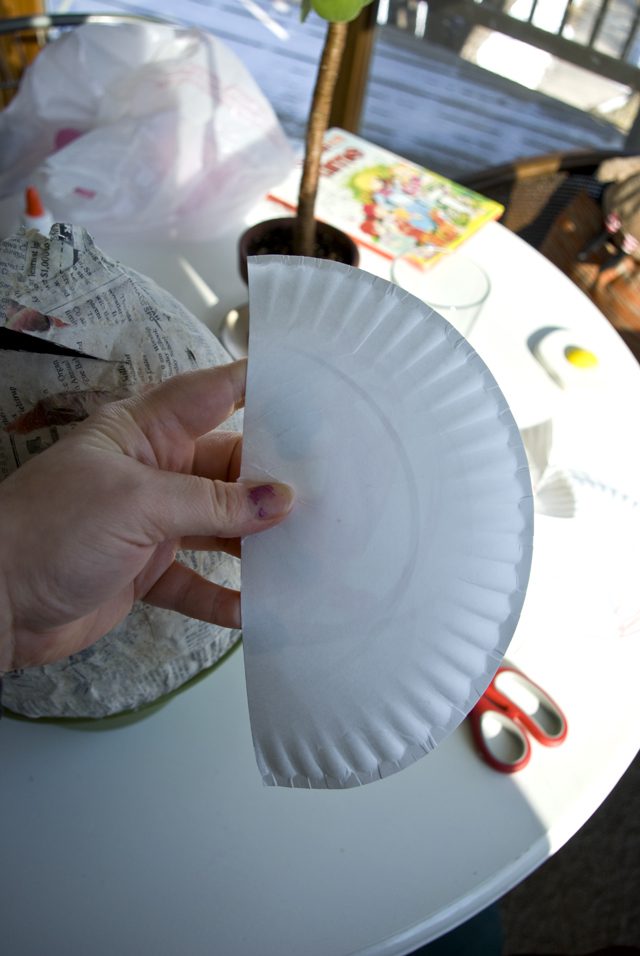
Just to make the horn sturdier, I shoved some extra paper inside.
Cut about four slits around the bottom – this will provide lips that can be attached to the unicorn head (I’m just going to call it “head” from now on, okay?).
Using heavy-duty packing tape, attach the horn near the top of the head…just off the candy hole.
Step Three: The Snout
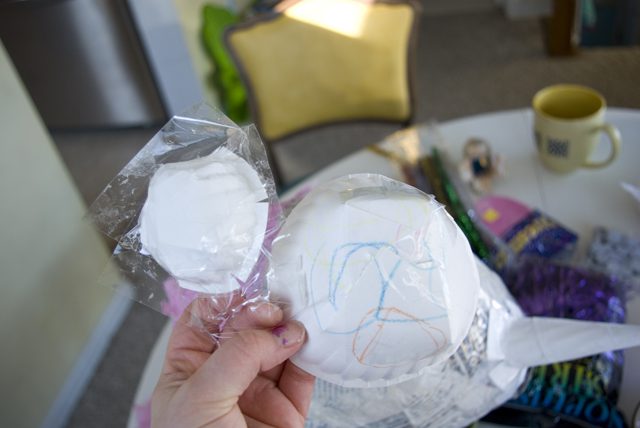
You’ll see I made two different snouts. I got about a third of the way into the fringe and realized my original snout was too small! So learn from my mistakes!
Using another paper plate, cut straight across just a bit more than half.
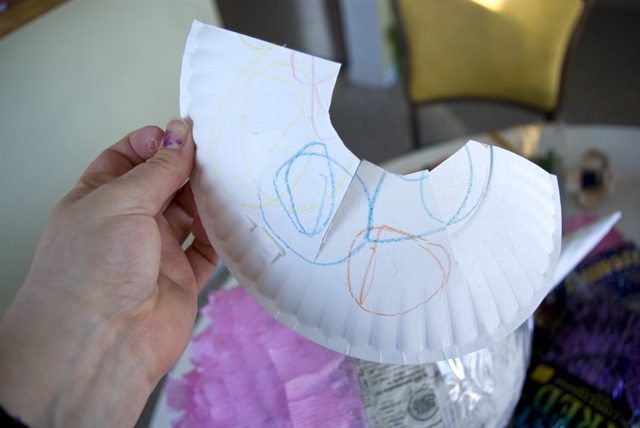
Cut out the center so it looks like half a doughnut.
Cut slits around the middle so it’s easier to fold into the snout.
Fold pieces over on top of each other (see photo from previous snout below). Once it looks like a snout, use heavy packing tape to keep it together.
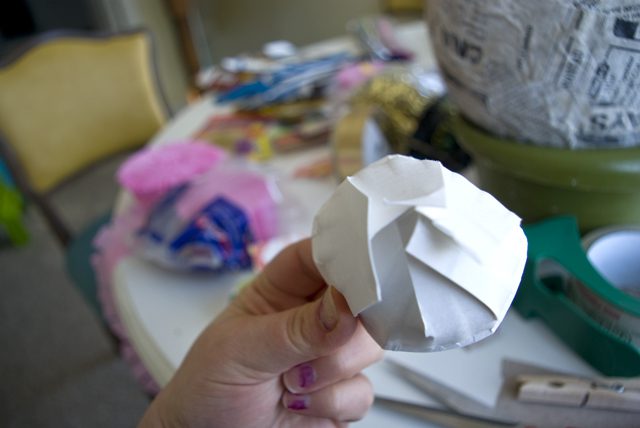
Attach to head just over halfway down the shell. If you squint, you can imagine your unicorn, so use this imagination to figure out the best position for the snout. Tape ‘er up.

At this point, I realized glue probably wouldn’t work great over the packing tape, so I layered on some blue painters tape. Bonus: it adds strength to the snout, horn, and the over-all piñata!
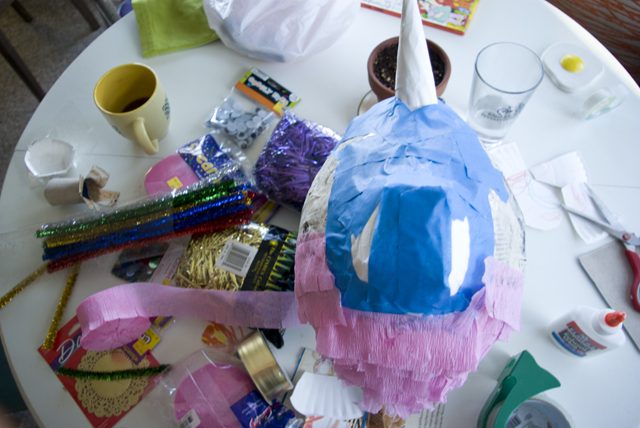
Step Four: The Fringe
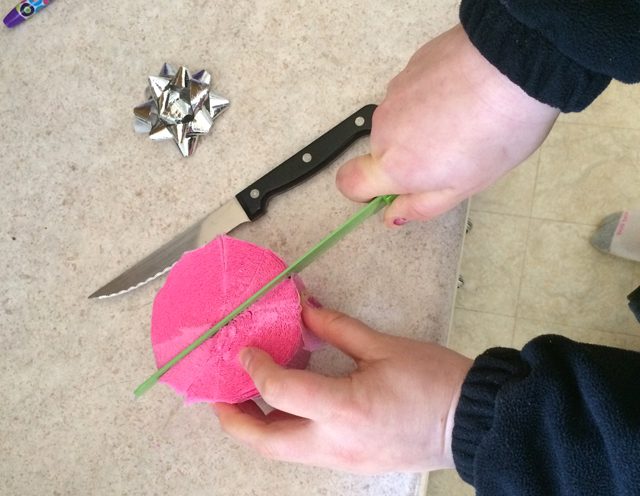
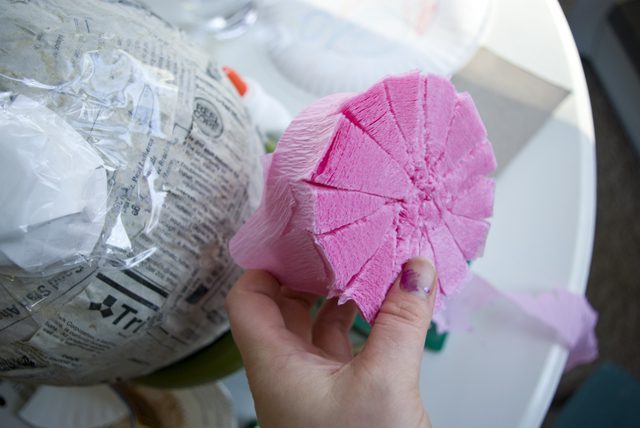
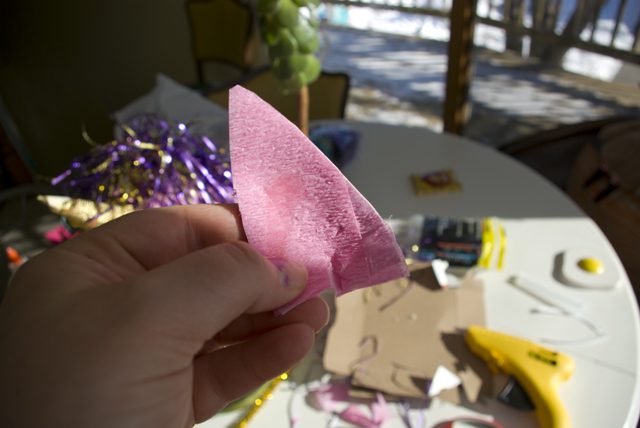
This is going to revolutionize fringe for you (did you know that was possible?)! Take a roll of streamers in your desired unicorn color (ours was pink). Grab a serrated knife. We used our bread knife. It wasn’t super expensive or anything…but do be careful (disclaimer: we are not responsible for any streamer sawing mishaps). Saw carefully around the roll as though you’re cutting a pizza into small triangles. Make sure not to go all the way through the roll, though (you’d really have to work hard to do this). One roll was plenty for our unicorn.
Using Elmer’s (or similar school) glue, start rolling the fringe out at the base of the head. (It was at this point that I realized I needed to make a bigger snout…)
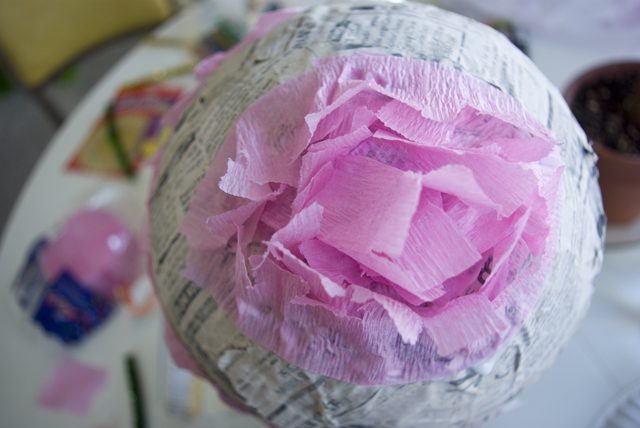
Use your artistic abilities to decide how you want the snout to look. I thought flat streamers would look best on the snout, so I glued a few layers of streamer across that before continuing with the fringe.
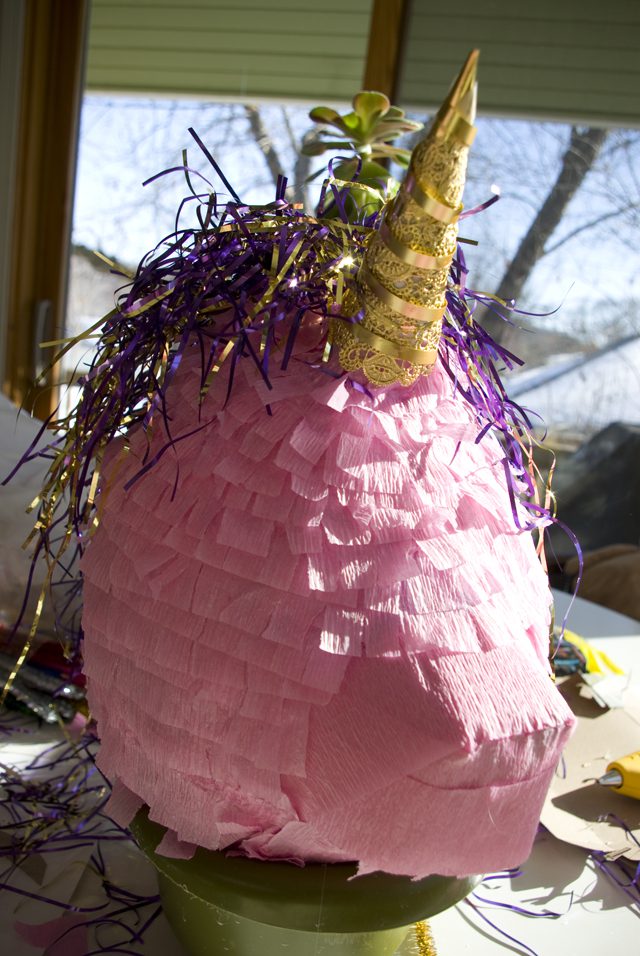
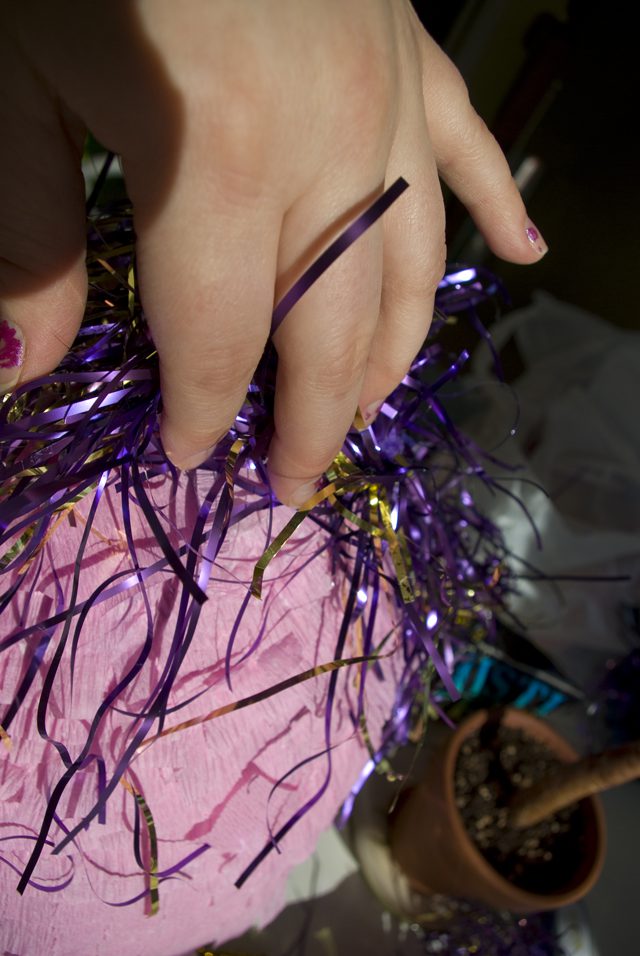
Continue with the fringe until you’ve covered the entire head.
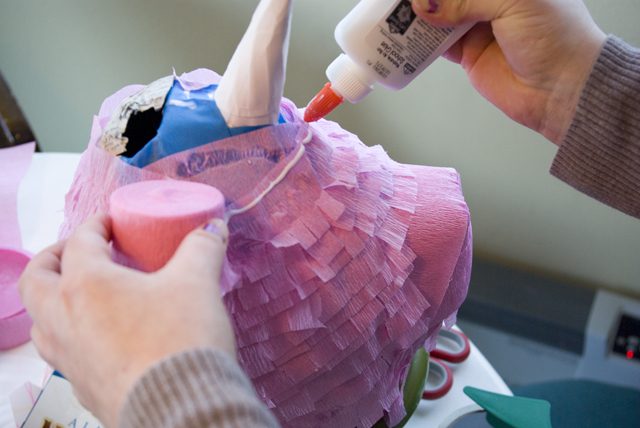
Step Five: The Hair!
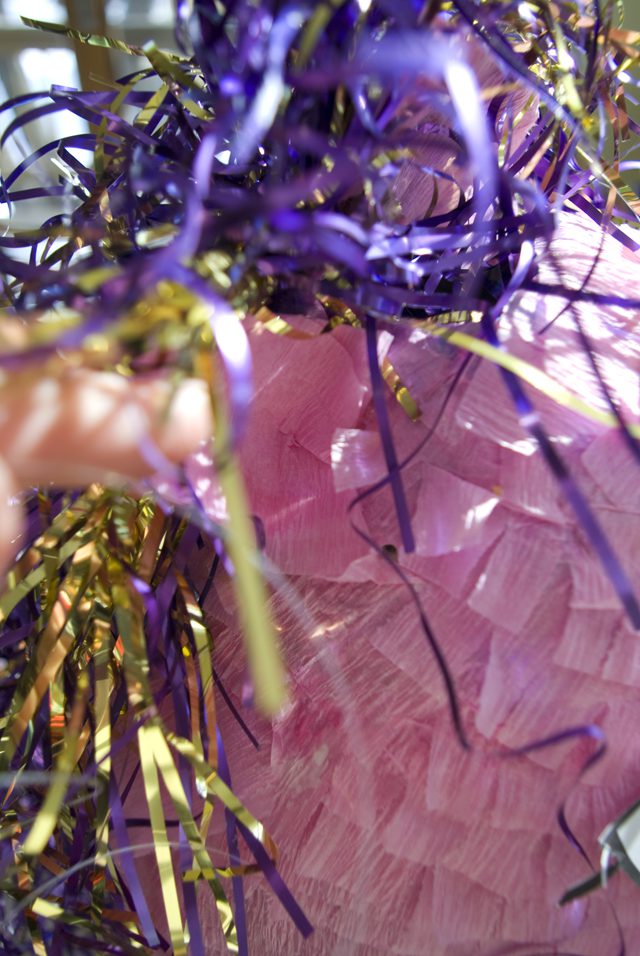
Okay. There is surely an easier way to create hair for your unicorn. Construction paper fringe? More streamer fringe? Glue it on there and call it good. But I wanted tinsel hair. If you do too, follow these instructions.
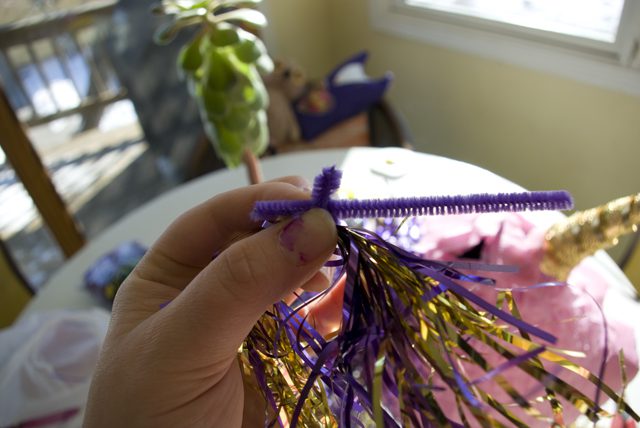
Place one pipe cleaner on a piece of newspaper. I used school glue, but would be interested to see if hot glue would work (it might melt the tinsel…).
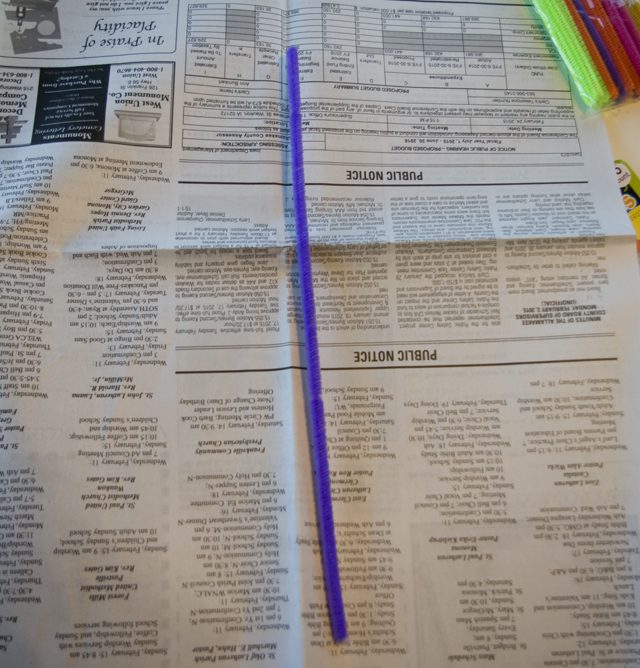
Run a bead of glue down the whole pipe cleaner. Place tinsel over it – it can be messy, but try to have the middle go somewhat across the pipe cleaner.
Run another bead of glue over the middle of the whole mess and put another pipe cleaner over top of that.
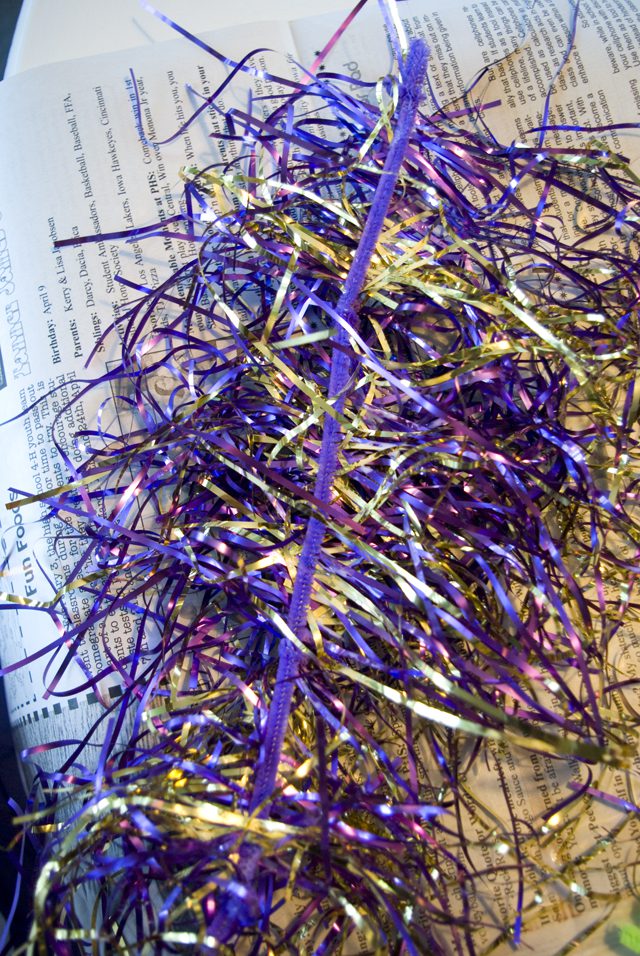
Twist the pipe cleaners together at the top and bottom.
Let dry for a bit…an hour?
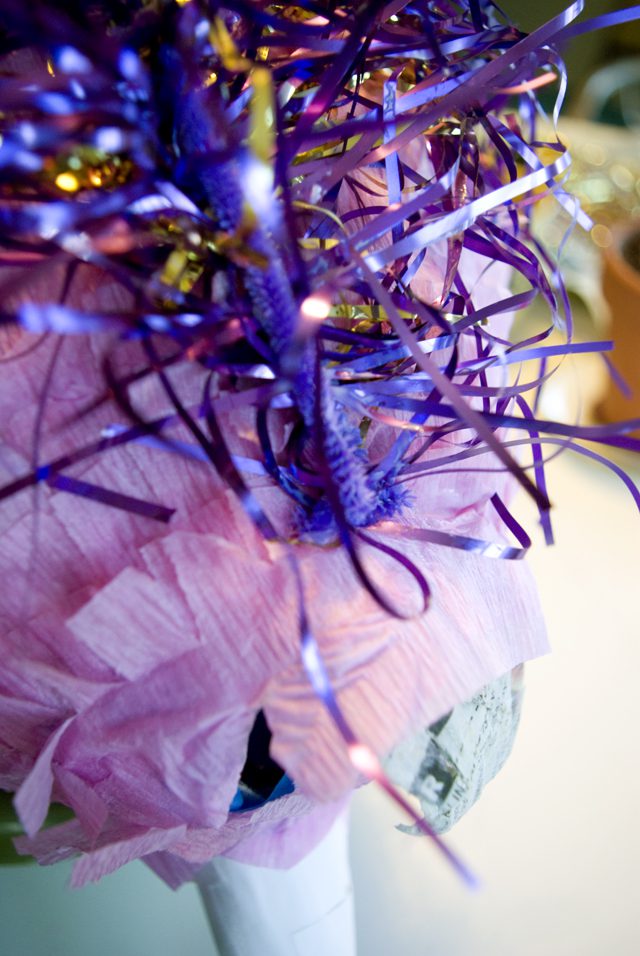
Using a wee screwdriver, put a little hole in the head near the top and bottom so you can insert the pipe cleaners along the back of the head to form the “mane”.
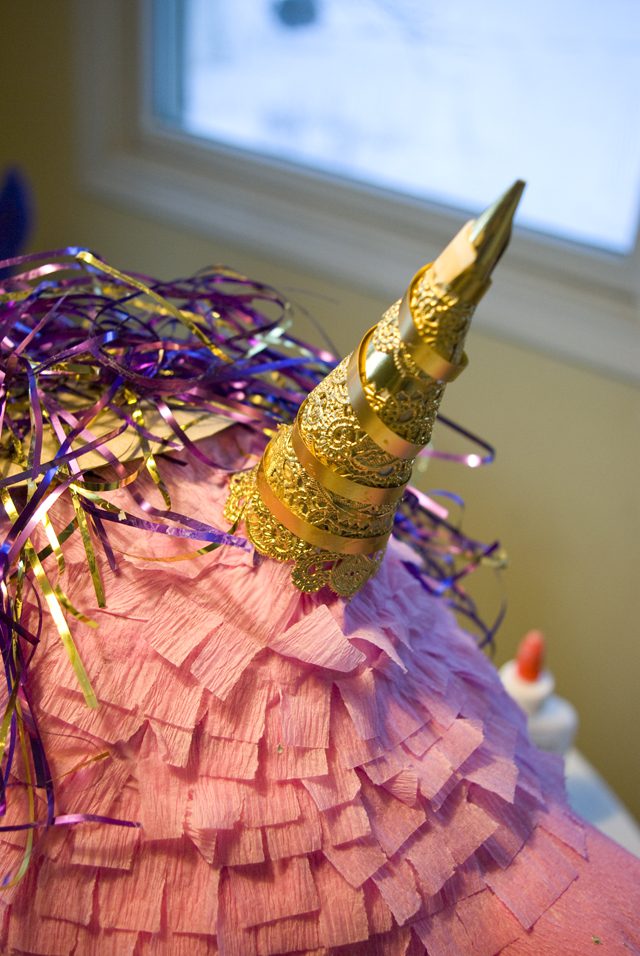
Step Six: The Horn
I used gold foil doilies for my horn. You can use whatever you would like – tin foil? Glue and glitter? Get creative.
I finally broke out my hot glue gun for this part! Cut the doilies in half and wrap around the horn so no white is showing.
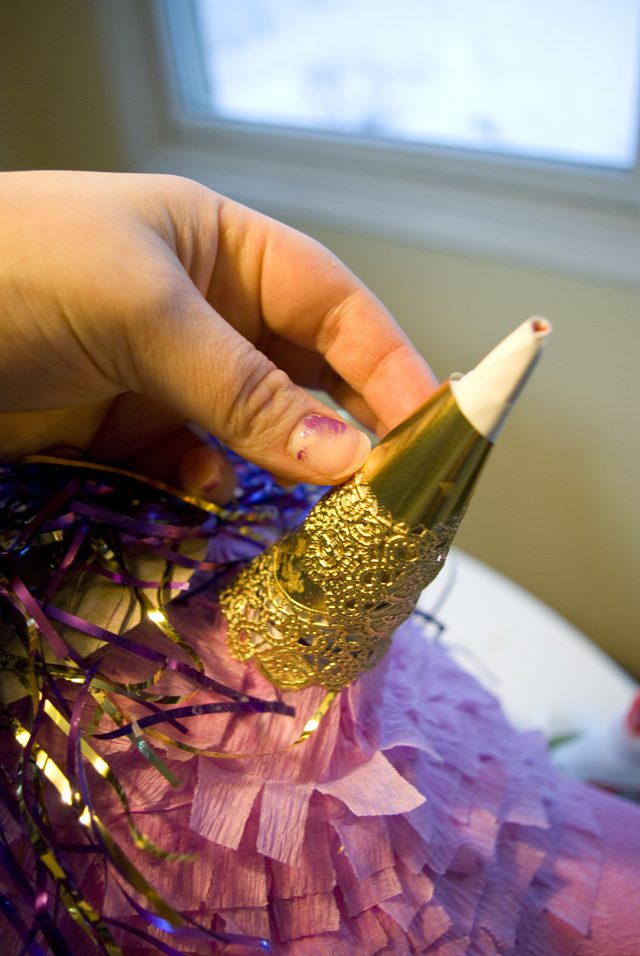
For added bling, we used some gold ribbon. Just dot some hot glue around the horn as you’re wrapping.
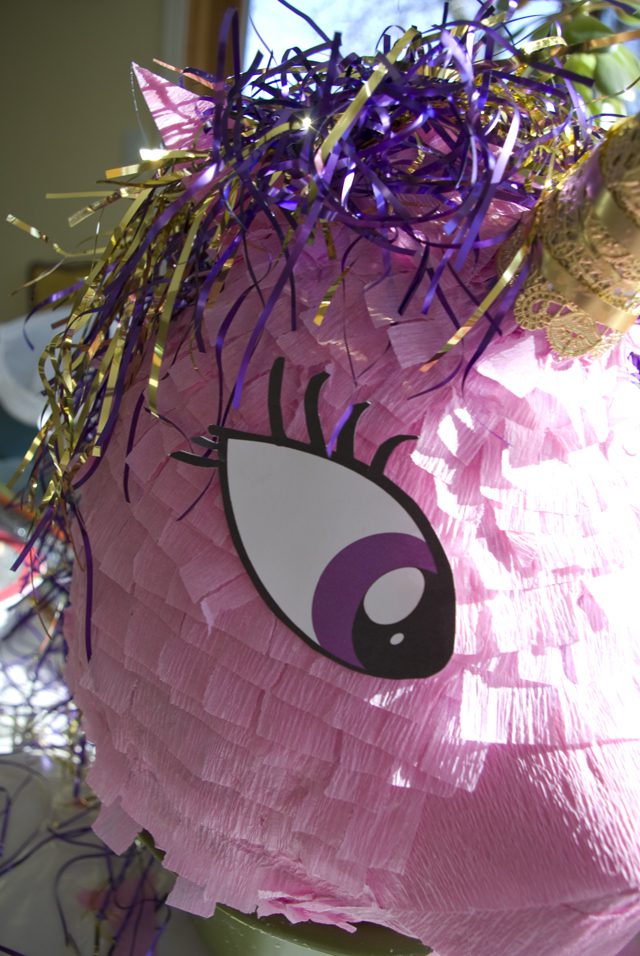
Step Seven: The Bangs
The bangs took some figuring out. I tried a couple of different things but ultimately, making little “pony” (unicorny?) tails worked best.
Gather a tinsel “bunch”. Cut one pipe cleaner in half. Then cut one of the halves into thirds.
Wrap a pipe cleaner section around your tinsel bunch.
Repeat with the remaining two sections.
Take the half pipe cleaner and attach your three pony tails to it (folding the pipe cleaners around the half piece), making the bangs!

Using hot glue, attach the bangs at the top of the head over the candy hole.
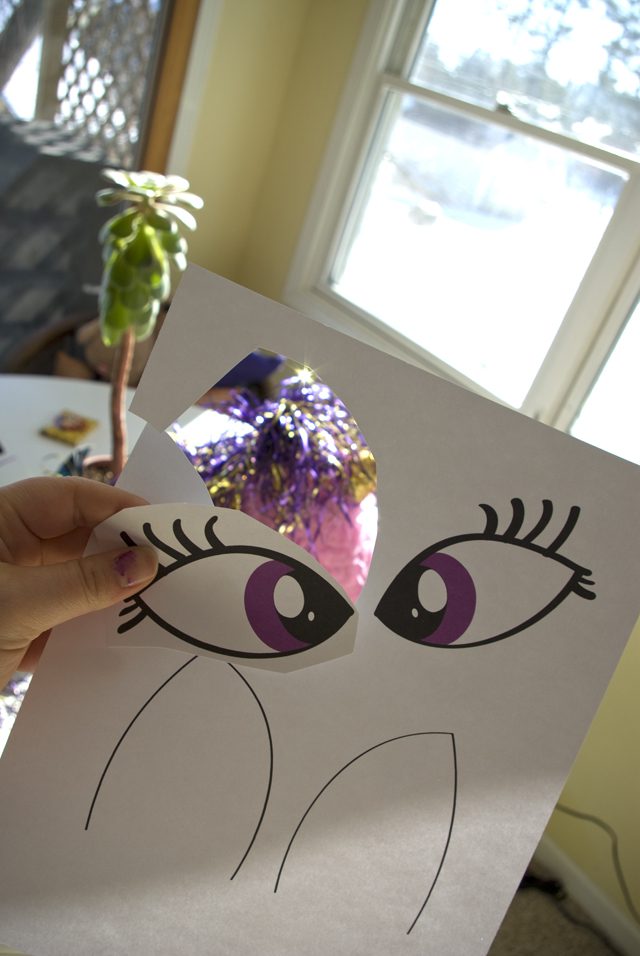
Step Eight: The Face
Download the parts of the unicorn face here.
Cut out the eyes and ears.
Cover the ears with whatever color streamer you decided to use for your unicorn. Hot glue streamer over the paper ears, and then trim off the excess.
Cut a little tab in the middle and bend the bottom of the ear so it can attach to the head.
Hot glue it near the bangs…you know…where a unicorn ear might go!
Repeat on the other ear.
Hot glue the eyes…you know…where unicorn eyes might go!
Attach or marker on nostrils, if desired. We used two little confetti pieces. You could also cut out round holes from gold doilies or tin foil. Again, get creative.

Step Nine: The Handle
Using that wee little screwdriver, put two holes at the top of the head near the candy hole.
We used clear, thick fishing line…twine or other string would work as well. Cut a long piece, make a knot on one end, and string it through one hole.
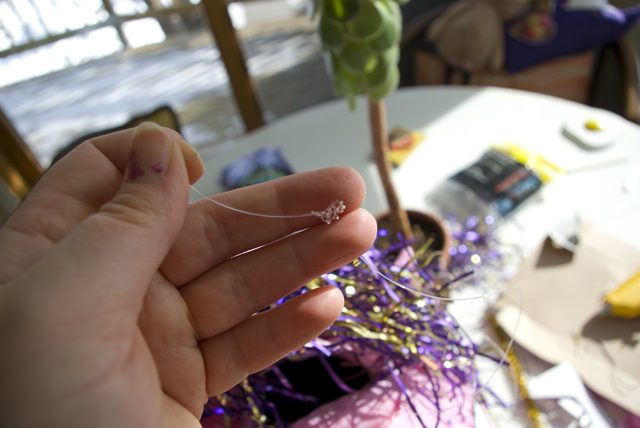
String the other end through the other hole, so the open (unknotted) end is inside the head. Knot that end so it catches in the hole.
I didn’t get a photo of this, but I think it would be wise to reinforce your knots by using some heavy-duty tape (duct tape?) over the knots and the holes inside the head.
Step Ten: Ta Da!
Option 1: Fill your unicorn with candy, confetti, or other fun stuff, and plan your unicorn piñata-bashing party (if you can bear it…I’m having a hard time imagining cracking our poor unicorn’s head in…).
Option 2: Hang her up and enjoy her for eternity!