Sponsored by
Bloom Flower Farm
Bloom is a small flower farm in Northeast Iowa run by Jen Opheim and family. At Bloom, we love to watch things grow and to be creative. It all begins with a vision. Maybe you want fresh locally grown flowers for your DIY wedding bouquets. Maybe you want to promote your business with a petite posy giveaway. Or maybe you have a flower friend who would love a unique gift of blooms through our seasonal CSA. Whatever your flower needs are, we’re happy to help. Let’s create something beautiful together!
Make a Paper Gnome Hat (Plus Beard!)!
Sponsored by
Bloom Flower Farm
Bloom is a small flower farm in Northeast Iowa run by Jen Opheim and family. At Bloom, we love to watch things grow and to be creative. It all begins with a vision. Maybe you want fresh locally grown flowers for your DIY wedding bouquets. Maybe you want to promote your business with a petite posy giveaway. Or maybe you have a flower friend who would love a unique gift of blooms through our seasonal CSA. Whatever your flower needs are, we’re happy to help. Let’s create something beautiful together!
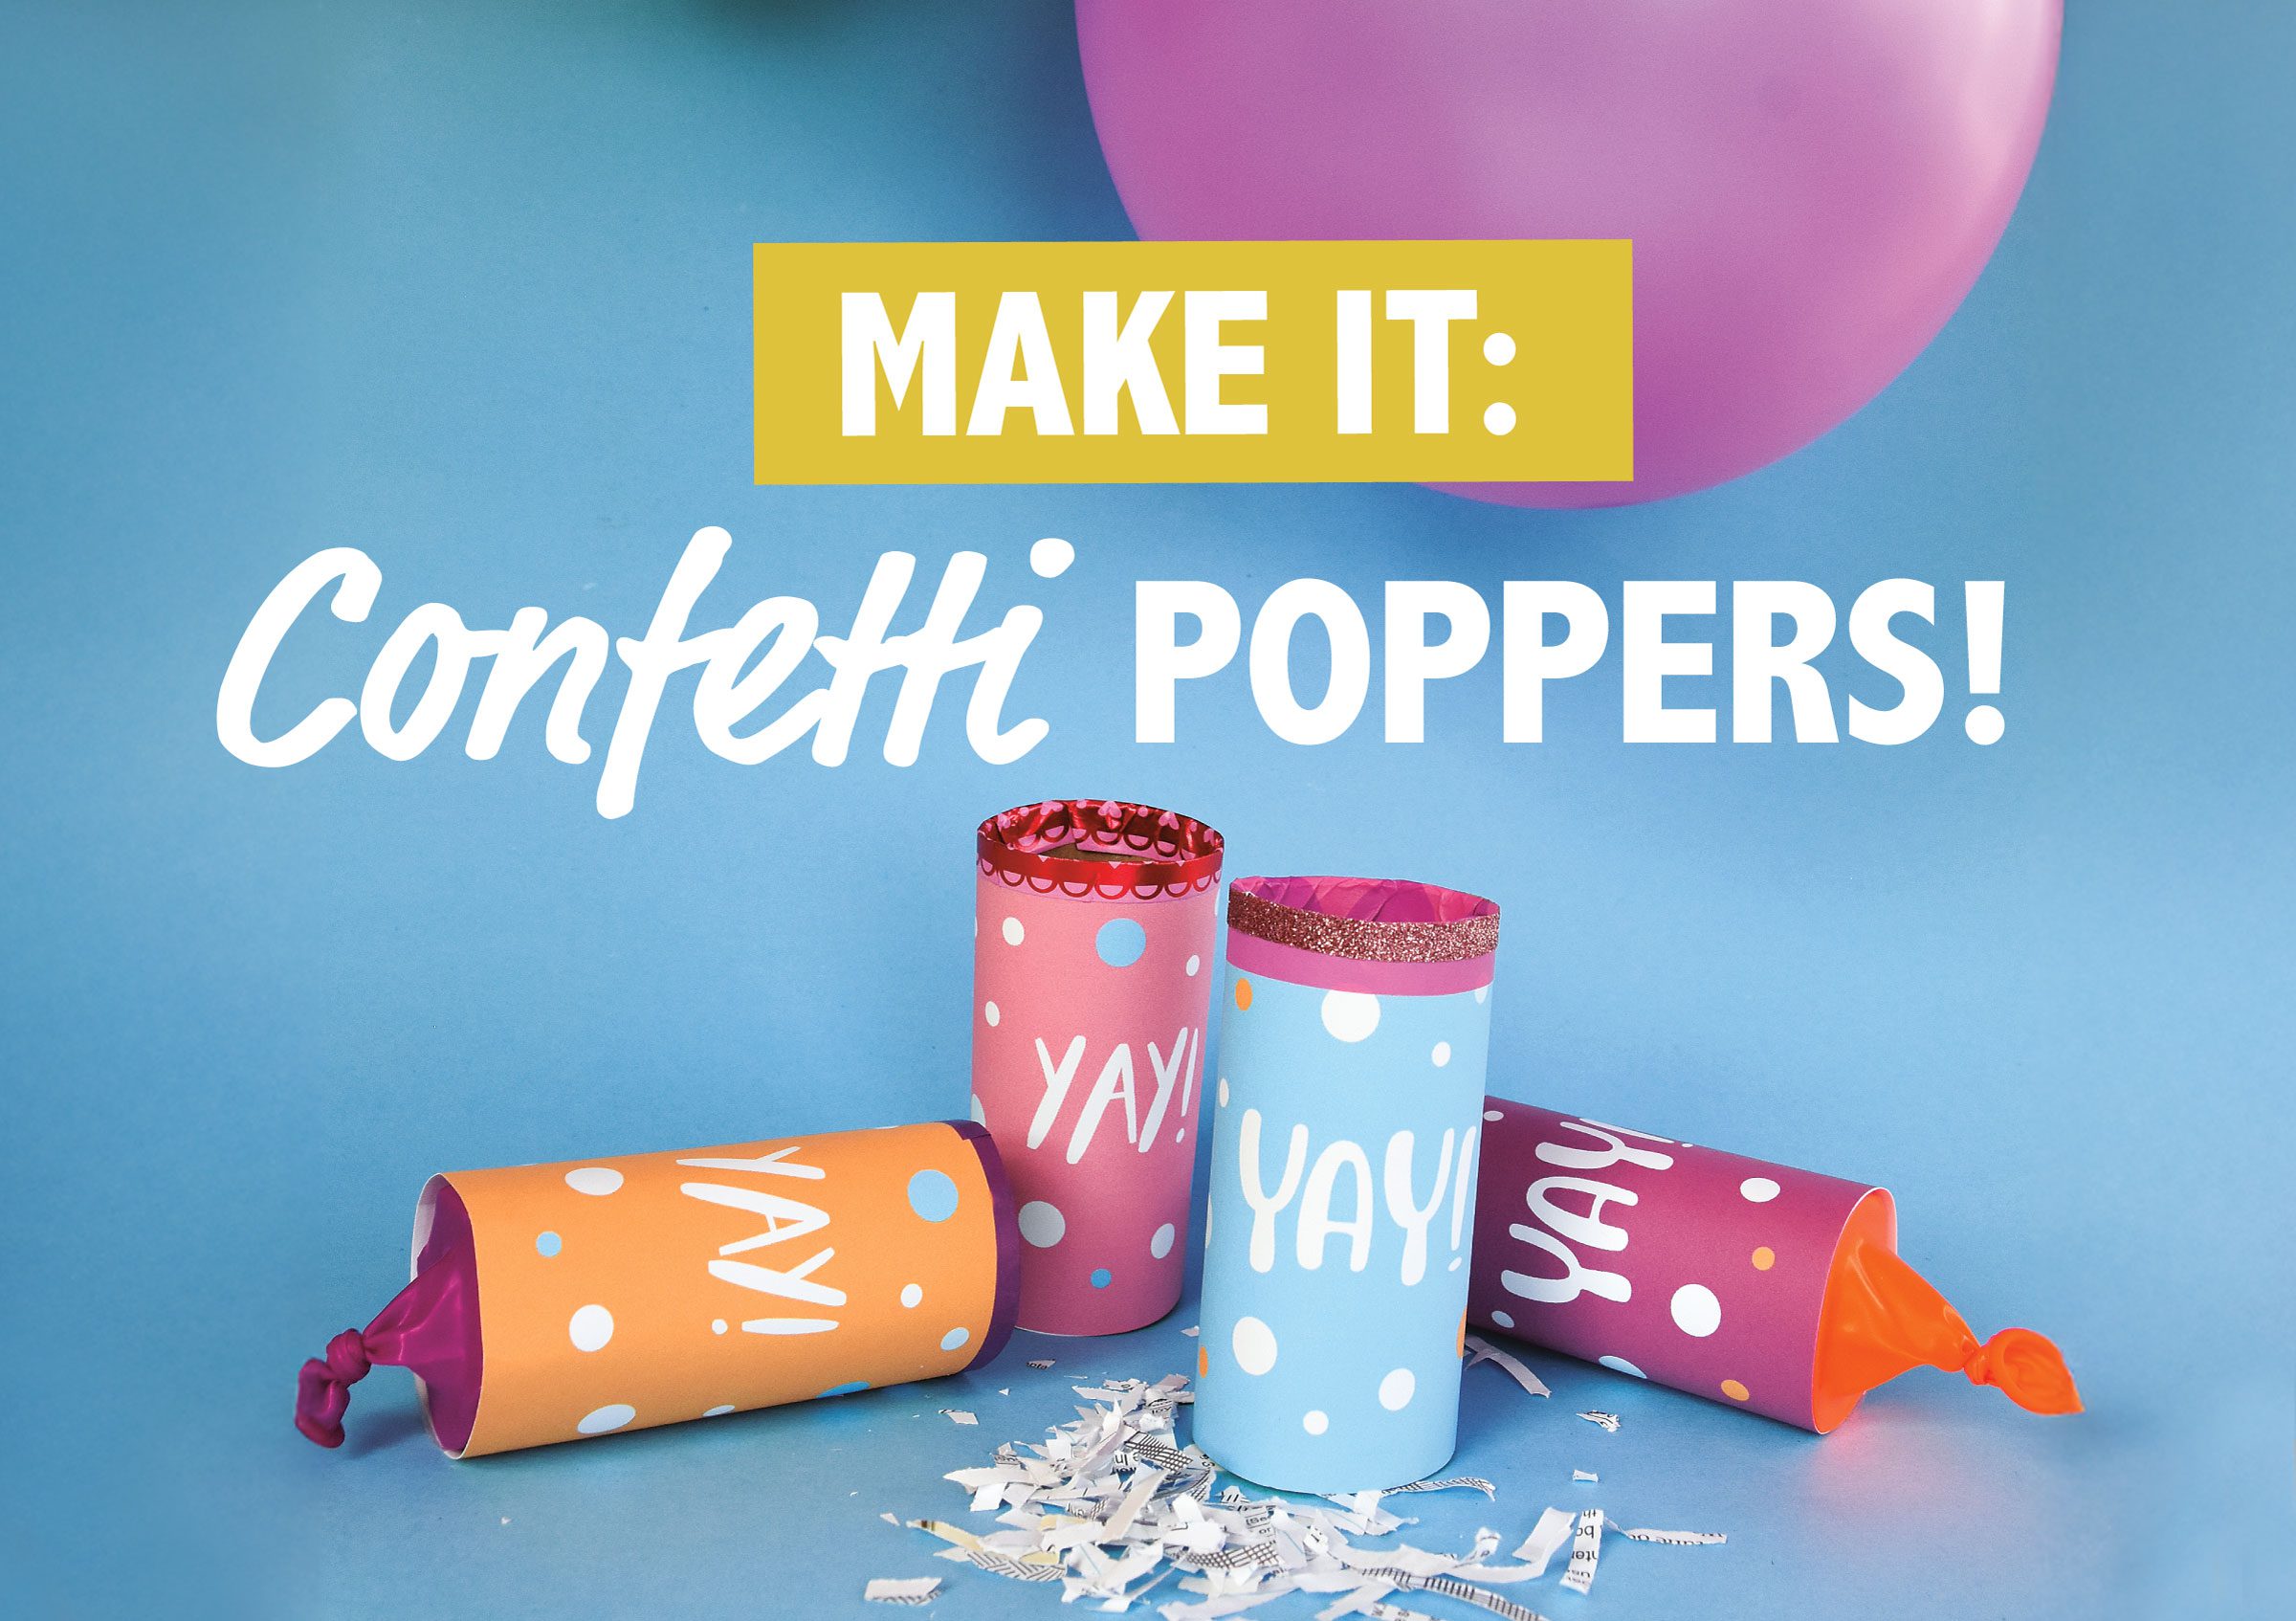
Making a gnome hat + beard is seriously one of the easiest paper projects ever! It can be done in minutes with these easy supplies and directions. Check it out!
Supplies:
Scissors
Stapler
Tape
Two rubber bands
Paper hole punch
Gnome Hat and Beard template (download here)
*Sorry about a couple of out-of-focus one-handed pics! I hope you enjoy the fun!

1. Cut out the hat and beard.

2. Tip: Get your pieces of tape ready before you start! You’ll need six pieces total.

3. Bring the flat edges of the hat together and tape (the more even the bottom, the better).


4. Tape a spot at the bottom of the hat above where each ear will be (it will strengthen the area that is connected to the rubber band) and using your paper hole puncher, put holes through the tape


5. Take your beard and fold the tips (that will go toward your ears) and tape them down (I thought of this later, so this isn’t photographed very well, but again, it will strengthen the area that is connected to the rubber band).

6. Punch a hole in each beard tip through the tape.

7. Cut each rubber band once (you’ll then have two long pieces instead of two rubber bands).

8. Attach the bands to the beard by tying them, and to the hats with a staple (stapling the beard might hurt you, but the staple at the hat seems to make it stronger).


9. PUT IT ON AND GET EXCITED! I know I did.